How to get started with Python and it's machine learning ecosystem
Installing Python
Welcome to Python!
So you have decided to install Python, great!! Whether you have never written a single line of code or are a veteran computer scientist, Python has plenty to offer. Its easily digestible syntax and memory management make it a great starting point for beginners, while its versatility and feature-rich ecosystem make it a go-to for professionals across industries.
If you're visiting this website, odds are that you plan to leverage Python's machine learning libraries. You would be hard-pressed to find a better language, as Python is the de-facto standard for ML research and development. Much of the computational heavy-lifting is done in lower-level languages (such as C++ and Cuda) that have advantages over python regarding speed and memory. Python serves as an interface to these optimized libraries, allowing us to write code that runs fast without having to deal with the complexity of the lower-level languages. Later on, we will discuss a few of the main Python packages for ML - namely PyTorch and Tensorflow.
Understanding Python Versions
For those unfamiliar with software version numbers, there is a loose convention that
is followed by most projects.
Typically, a software version is a series of numbers seperated by dots.
These numbers represent changes or updates to the software, and are ordered in decreasing
importance from left to right.
As of this writing, the latest stable release of Python is 3.13.1.
The first number, 3, indicates that we are talking about Python3, the most widely
used Python version today.
Released in December 2008, Python3 succeeded Python2 and introduced some breaking changes.
A breaking change is one that disrupts backwards compatibility, meaning that code
written for Python2 can not be run by Python3.
This is a big deal in the "software world", and is why the first number was increased.
You might bump into some old Python2 files collecting dust on a server somewhere,
but for the most part you will be using Python3.
The second number, 13, represents the so-called "major version" of Python.
A major version release contains new features and/or performance enhancements,
but doesn't introduce breaking changes.
However, some packages can be picky about which major-version you use.
Occasionally, a package may only work with a certain version of Python3 or may
be prone to cryptic bugs if used with a newer version.
Thankfully, we can have multiple version of Python3 installed at the same time!
We will talk more about this when we discuss package managers.
The last number, 1, is the minor-version number.
It represents small changes and bug-fixes for any issues that may occur
after a new major-version is released.
Choosing a Package Manager
It's time to actually install Python, yay! But before we do, we need to pick a package manager. A package manager helps us install packages and create virtual environments. Python packages provide additional functionality beyond the base language features. Examples include Numpy for manipulating arrays and Matplotlib for creating visualizations.
Virtual environments let us isolate different sets of packages from one another. When working on a new project, we will often create a new virtual environment specifically for that project. This helps cut down on dependency conflicts, a situation where updating the packages used by one project causes issues to arise in a different project. Additionally, virtual environments are great for replicating a workflow or tutorial. If someone wants to execute a project on their own machine, they can replicate that project's virtual environment to get exactly what they need hassle-free.
PIP - The Default package Manager
When you install Python from python.org, it comes
with a default package manager called PIP.
To install a package with pip, you use the command pip install.
For example, if you wanted to install NumPy you would use pip install numpy.
If you just open up the terminal and run the previous command, NumPy will be
installed in your system interpreter.
As mentioned previously, this is not the best idea.
Usually you will want to first create a virtual environment, then install any
packages you want to use.
You can create a virtual environment like so:
python -m venv /path/to/new/virtual/environment
You can store your virtual environments (venvs) anywhere on your computer. Just be aware that the directory name (in this case, "environment") will be the name Python gives to the environment. It's helpful if that name follows standard UNIX rules, such as not having spaces.
Once the venv is created, you need to activate it first before you can use it.
You can do this by running the activation script, which on windows is located
at: /path/to/new/virtual/environment/Scripts/activate.bat.
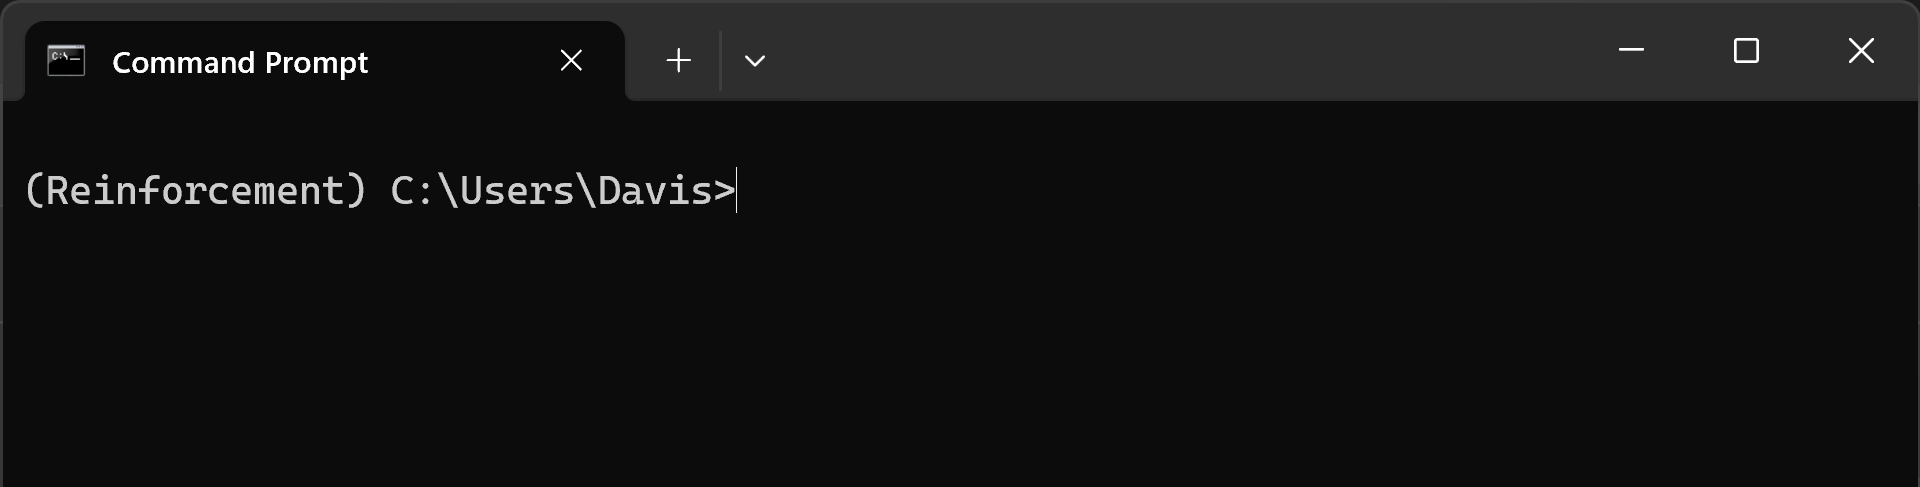
Run this, and you should see that your terminal prompt now is prefixed
by your environment name.
In my case, the venv is located in a folder called "Reinforcement", as it is
the environment I use for my reinforcement learning projects.
Now that your environment is activated, any packages you install will be contained to this venv. In most instances, the integrated development environment (IDE) you use to write code will automatically activate a venv for you when you execute a file from within its interface. If you ever need to execute a python file directly from the terminal, make sure to invoke the activation script before running the python file.
Anaconda
PIP is not the only method to create virtual environments and manage packages. An alternative called Anaconda gained popularity among the scientific community, and you will often see it used in tutorials. Anaconda will automatically install an appropriate version of Python on your system if you don't have one already.
Anaconda environments are created with conda create --name <my-env>, which
will place the environment in C:\Users\YouName\.conda\envs by default.
You can easily specify which version of python the env should use with
the python= flag.
For full details on environment management with Anaconda see
this link.
Since Anaconda tracks any virtual environments created with it,
you don't need to call the activation script.
Simply type conda activate <my-env> and your environment should be activated.
Similarly, use conda install <package-name> to install a package into whichever
env you have activated.
Writing Python Scripts
Now that we have python installed, we are ready to begin writing python scripts!
But what exactly is a python script, and how do we write one?
A python script is simply a text file — it can be opened with any simple text editor
such as Notepad, TextEdit, Sublime, and a variety of others.
Since it is a text file, "running" a python script directly does not do anything.
Whenever we "run" a python file (example.py), we are actually running the python executable
(python.exe) and passing the file as an argument. On the command line, this would look like:
python path/to/example.py
So if we want to create a python script, we can write code using a plain text editor and then run the code using the terminal. This gets the job done... but is not the most productive workflow. You will quickly discover that writing Python using Notepad is very tedious. Thankfully, we can also use an Integrated Development Environment (IDE) to edit and author code. An IDE increases developer productivity by providing a variety of tools all in one location. Some advantages over Notepad that you will immediately notice are syntax highlighting and code completion.
Syntax highlighting identifies keyword in your code and formats them to draw you attention. It makes your code easier to read and helps your eyes quickly jump to the region of interest. Here is a short python function with syntax highlighting:
1 def hello(x: int):2 for i in range(x):3 print('Hello World!')
1 def hello(x: int):2 for i in range(x):3 print('Hello World!')
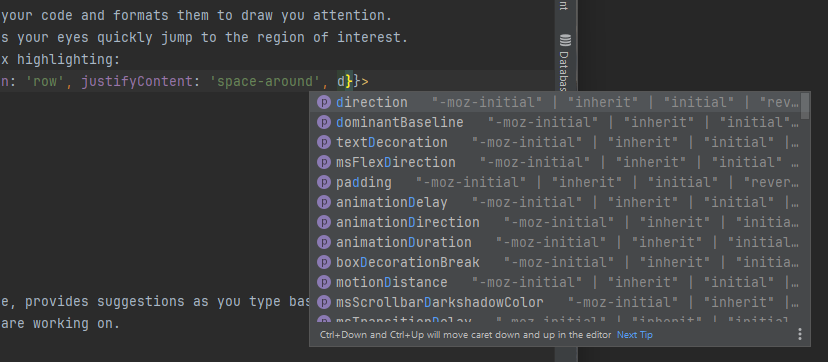
Code completion, also known as IntelliSense, provides suggestions as you type based on context clues in the file and project you are working on. Code completion can drastically increase productivity, reducing the amount of characters you need to type. Typically, this will be provided in a dropdown that appears near your cursor:
PyCharm Community
PyCharm is an IDE built by Jetbrains that is designed specifically to work with the Python ecosystem. It is very popular and widely used by Python developers in a variety of fields. The free community edition provides everything you need to get started writing software in Python.
Visual Studio Code
Visual Studio Code is an editor built by Microsoft that supports a wide variety of language through extensions and plugins. It is widely used by software developers working in many languages, as it provides a single place for projects regardless of the language.
Either editor is a good choice for writing Python code. Picking between them mostly comes down to personal preference. For those completely new to programming, PyCharm might be easier to set up and get started. Regardless of your choice, there are plenty of articles across the internet for any help you might need installing these tools.